Contents
Contouring for your face shape is drawing with lightFour face shapes, one contour tableWhy direction matters more than colourOval, diamond and pear facesBlend it, then use lessFAQKey points
- Shade what already dips in, highlight what already sits out. Follow the bones; don't paint a new face.
- Blush swept across draws a horizontal line; swept toward the temple, a rising one. Long faces lean on the first, round faces on the second.
- Guides disagree on details, such as shading a heart-shaped chin. The table is a start.
- Go one or two shades deeper than your skin, build in layers, check the edges in daylight.
Contouring for your face shape is drawing with light
Contour runs on one plain rule: darker areas seem to sit back, lighter areas seem to come forward.
So the deeper shade goes where the face already dips in: the hollow under the cheekbone, the sides of the nose. The lighter shade goes where it sits out: the top of the cheekbone, the brow bone, the bridge of the nose. As several makeup guides put it, the point is not a new face but a little more depth along the bones you have.
Blush adds a line. Swept straight across, it is horizontal; swept from the cheek up toward the temple, it rises at an angle.
That leaves two decisions per face shape: where, and which way. To work out your shape, see what is my face shape, or try a face report built from one front-facing photo.
Four face shapes, one contour table
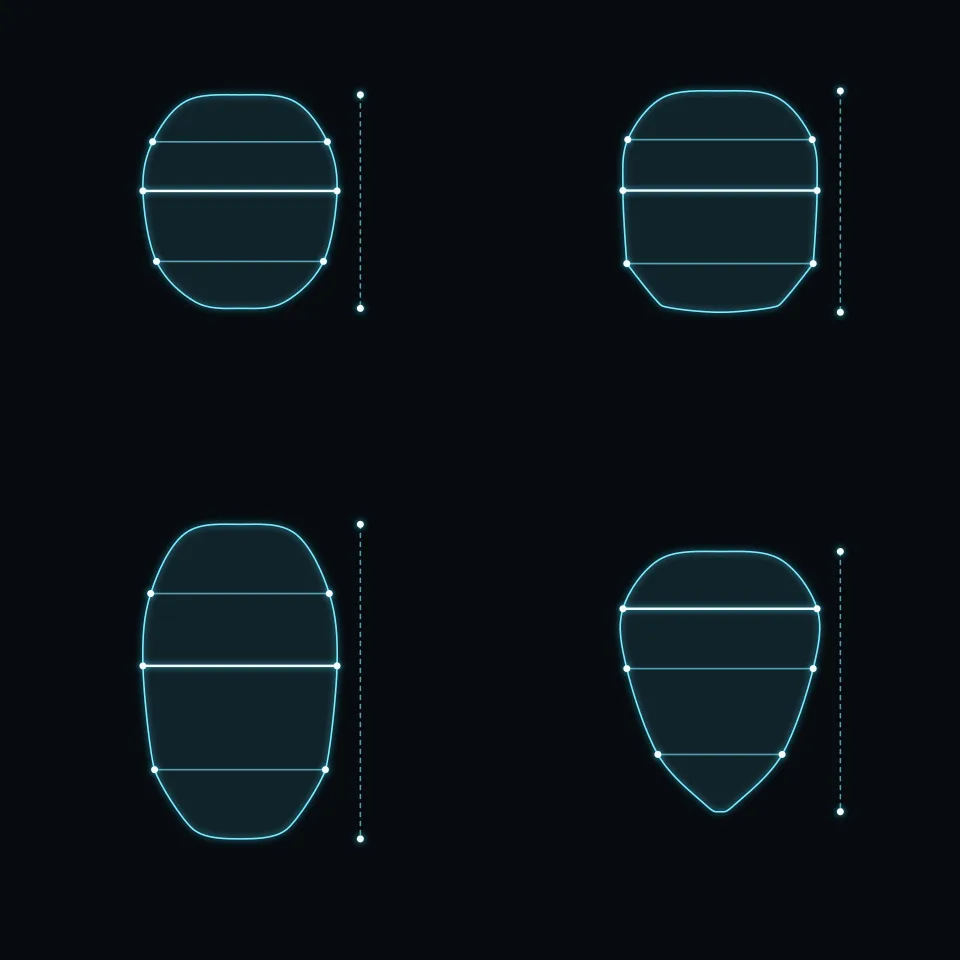
The table pools several makeup guides: placement and direction only.
| Face shape | Shading | Highlight | Blush direction |
|---|---|---|---|
| Round | Temples, sides of the forehead, under the cheekbones, then from below the ear along the jaw | Centre of the forehead, bridge of the nose, tops of the cheekbones | Just above the apples, swept out and up toward the temple |
| Square | Forehead corners and both jaw corners; only a light layer under the cheekbones | Bridge of the nose, tops of the cheekbones | On the apples, blended out and up in circles |
| Oblong (long) | Along the top of the hairline and under the chin, laid on horizontally; little on the sides; short and flat under the cheekbones | Kept to the centre of the face; none on the chin | Horizontal, a wide oval at the level of the nostrils, not pulled far either way |
| Heart | Sides of the forehead and temples; a short stroke on the outer cheekbone; little or none on the chin | Tops of the cheekbones, centre of the forehead, chin | A “C” from the top of the cheekbone up to just above the tail of the brow |
For round faces, two guides suggest a matte or semi-matte blush over a shimmery one.
Why direction matters more than colour
The same shade laid flat or at an angle draws two different lines.
- Oblong: a Japanese makeup tutorial puts the hairline and chin shading on horizontally and keeps it off the sides of the face, with blush swept across at nostril level. Another guide keeps the cheekbone contour flat rather than angled. No highlight on the chin, since that pulls the eye down.
- Round: the cheekbone shading starts in front of the ear and angles into the cheek, blended upward; temples, cheekbones and jaw join into one vertical run.
To be straight: this is makeup artists’ experience, and the guides clash. For a heart-shaped chin, one says shade it, one says skip it, one says a touch. The answer is on your own face.
Oval, diamond and pear faces
The diagram shows four shapes. The other three, briefly:
- Oval: keep it light. A soft layer on the temples and under the cheekbones, blended toward the ears; no heavy jaw contour. Blush on the apples or the tops of the cheekbones.
- Diamond: shade the outer tips of the cheekbones rather than underneath, plus a light touch on the sides of the forehead and the jaw. Brighten the centre of the forehead and the chin. Blush on top of the cheekbones, blended toward the ears.
- Pear: a little shading along both sides of the jaw, and light on the forehead and temples to draw the eye up.
Blend it, then use less
The usual problem is not the wrong place but a visible edge.
- Shade: one or two shades deeper than your skin, in a muted tone that looks like real shadow rather than something red or yellow.
- Darker outside: deepest at the hairline and in front of the ears, fading toward the centre of the face.
- Layers: tap the brush on the back of your hand first, then build up. If you overdo it, press a little powder or cushion over the top.
- Daylight check: what looks seamless under indoor light can show a clear edge in the sun. Step to a window before you head out.
FAQ
What's the difference between contour and bronzer?
Contour shades are usually cool, to mimic shadow; bronzer is warm, like sun. Bronzer used as contour can look less natural, though you can layer the two.
Contour before or after foundation?
Either. Foundation first gives a crisper result; contour first, with foundation blended over it, gives a softer one.
I've never contoured. Where do I start?
Try the "3": on each side, run from the side of the forehead, under the cheekbone, to the jaw. Use a shade just one step deeper than your skin, then blend.