Contents
How to style your hair: five steps, five minutes, in this orderWhere the volume sits changes the outlineThe blow-dryer: roots first, then cool airClay, paste, wax, spray: pick by hold and shineHow much, and how to put it on: a pea, then addWashing and product build-upWhat goes wrong: flat, greasy, stiff, gone by lunchFAQKey points
- The order: towel-dry, dry the roots first (against the way the hair falls), switch to cool air for 5 to 10 seconds to set, add a pea of product, then stop. Five minutes is a budget, not a measured average.
- Hold the dryer about 15 cm (6 in) away, keep it moving, and use the lowest heat that dries. Dermatology advice is to use heat tools as little as you can, aiming for once a week or less.
- Pick a product on two columns: hold and shine. Start with the weakest hold that works; dermatologists advise against long-lasting-hold products.
- Volume on top makes the outline taller and volume at the sides makes it wider. That is stylist craft, not a measured effect, so compare two photos taken the same way.
How to style your hair: five steps, five minutes, in this order
How to style your hair is an order, not a product: dry, lift the roots, set with cool air, add product, stop. When a good cut falls flat by the next morning, one of these five steps was usually skipped or done backwards. The order is the same for anyone.
First the budget: for short to chin-length hair, five minutes. That is a budget, not a measured average, and long hair takes longer. Time yourself once.
- Blot with a towel; don’t rub. Wrap the hair in a towel or an old t-shirt and press for about a minute. The American Academy of Dermatology (AAD) says rough rubbing damages hair, and wet hair is delicate. Straight hair should not be combed until it is partly dry; then use a wide-tooth comb.
- Dry the roots first, against the way the hair falls. Hold the dryer about 15 cm (6 in) away, keep it moving, and use the lowest heat that gets the job done. Roots count only when they are dry; while they are damp, the shape is not set yet.
- Roots dry? Switch to cool air for 5 to 10 seconds. Hair takes its shape as it dries and cools. Let go while it is still hot and the shape drops.
- Product: a pea, warmed between your palms, spread with your fingers. Clay, paste and pomade go on dry hair. No comb.
- Finish: spray from about 30 cm, one pass, then keep your hands off. Skip the spray if you don’t need it; just stop after the product.
Whether the dryer should run every day is a question for section 3. The dermatology answer is: as little as you can.
Where the volume sits changes the outline
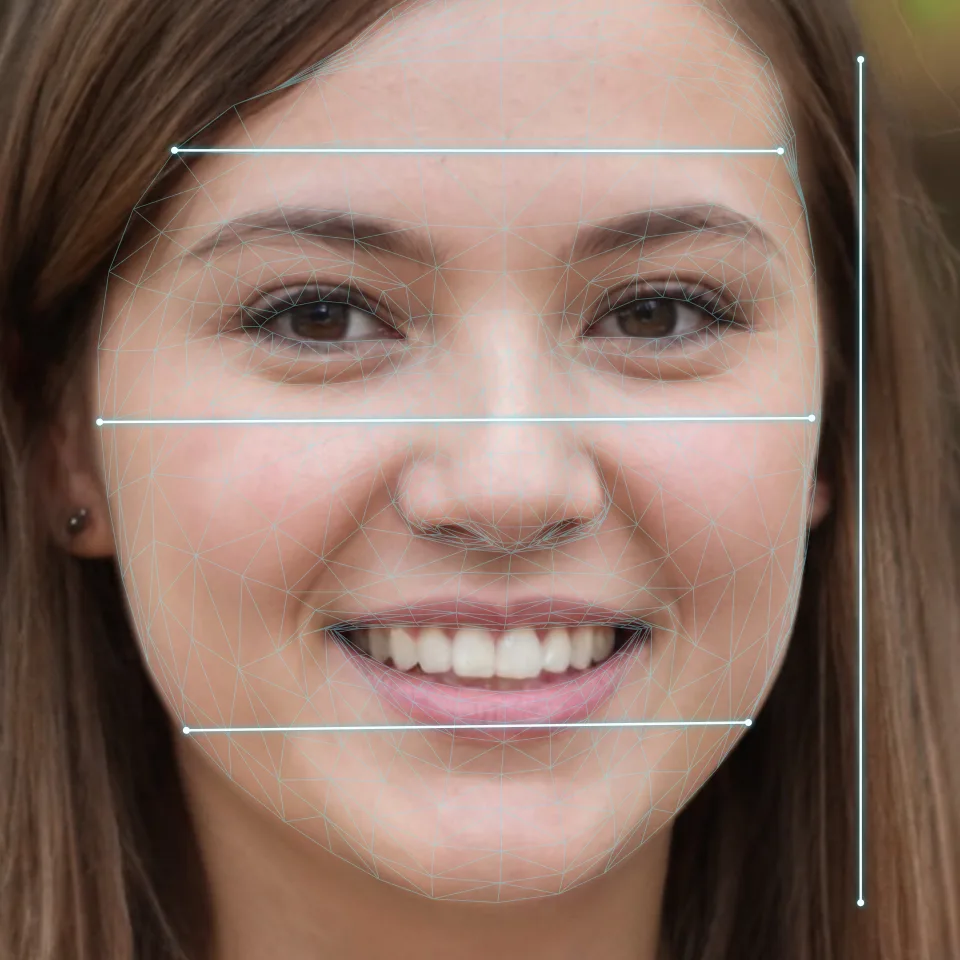
One cut can be dried taller or dried wider. The scissors decide how long the hair is; the dryer and the product decide which level the volume lands on. And what other people see is the outline that hair and face draw together.
- Volume on top: the outline gets taller and the face reads longer.
- Volume at ear to cheekbone height: the outline gets wider and the face reads wider and shorter.
- Fringe falling forward and down: the visible stretch of forehead gets shorter.
To be clear: these three are stylist craft, not measured effects. No controlled test turned up that changes only the hair volume on a fixed face and asks people to judge its length or width. Treat it as a hypothesis worth trying, not a law.
Which way each face shape should push is already covered, so this article won’t repeat it. The overview is hairstyles for your face shape; for a rounder face that wants height, see hairstyles for round faces; for a longer face that wants width, hairstyles for long faces; the forehead is the fringe’s job, see hairstyles for a high forehead. This article is about your hands on a weekday morning: where you push the volume as you dry.
Try it on your own hair. Finish the routine above, leave your hair alone, and take one front photo: rear camera, phone propped at eye height 1.5–2 m away, 3 to 10 second timer, window light, same spot every time; see the front-facing photo guide. Look at the shape that hair and face make together. Where is the widest line: at the temples, the cheekbones, or higher? Is the shape taller than it is wide, or wider than tall? Then compare it with the face shape you know: did the volume go the way that shape wants, or against it? If you don’t know your face shape yet, use a second front photo with your hair tucked behind your ears; the card below picks up from here.
The blow-dryer: roots first, then cool air
First, why this order. Hair holds its shape with weak but numerous chemical bonds, called hydrogen bonds. Water and heat break them; as the hair dries and cools, they re-form in the new position and the shape sets. That is how a chemistry PhD explains it in her beauty-science writing. Three things follow:
- A shape set as the hair dried goes back the next time it meets water or damp air: one wash resets it, and a humid day loosens a style you blew in at breakfast.
- Letting go while hot means the shape has not set. That is the case for cool air.
- “Cool air closes the cuticle and adds shine” is repeated everywhere. No study backing it turned up, so it is left out here.
Start from partly dry hair. The AAD says to let hair partly air-dry before styling. One stylist guide puts a number on it: roughly 70 to 80 percent dry before the dryer comes on. That is a rule of thumb, not a measured threshold; by touch, it means no longer dripping and cool-damp.
While drying:
- Top first. The crown and the front hairline flatten first. Lift the hair with your fingers against the way it falls and aim the air from the root toward the tip, with the dryer always moving.
- To keep the sides flat, do the opposite. Dry them in the direction you want them to lie, pressed under your palm, then cool air. This one is inferred from the mechanism above; the guides read cover lifting roots and say nothing about pressing sides down.
- Stop when the roots are dry. Every extra second only adds heat.
For heat and distance there is an experiment to read against. In a 2011 paper in Annals of Dermatology, a Korean group shampooed and dried tresses of hair once a day for 30 days. A dryer 15 cm away for 60 seconds gave about 47 °C next to the hair; 10 cm for 30 seconds, about 61 °C; 5 cm for 15 seconds, about 95 °C. A fourth group air-dried, which took over two hours. The hotter the group, the rougher the hair surface, and at 95 °C the cuticle scales showed holes. No group had cortex damage. Oddly, the layer that glues cells together inside the hair was damaged only in the air-dried group, and the authors suspect hair sitting wet for hours. Their conclusion: a dryer does more damage to the surface than air-drying, but a dryer held 15 cm away and kept moving does less damage than air-drying.
Keep its limits in mind: tresses, not people, and one dryer. Another dryer at the same distance gives a different temperature.
The AAD is more cautious. It asks you to use dryers and irons as little as you can, aiming for once a week or less, and when you do, to pick low or medium heat and add a heat-protecting product. A flat iron goes on dry hair only, at most every other day; a curling iron stays a second or two in one place. The two do not conflict: to use less, don’t run it every day; when you do, hold it far, keep it moving, keep the heat low.
On days without the dryer: blot with a towel; when the hair is partly dry, work in a little cream or paste (cream spreads easiest on damp hair); push the top up and back with your fingers; then leave it to dry and don’t touch it.
Clay, paste, wax, spray: pick by hold and shine
Product names vary by brand, and two products with the same name can hold differently, so the label wins. The table is what several salon and barber guides agree on.
| Product | Hold | Shine | Better for | How to use |
|---|---|---|---|---|
| Clay | Medium to medium-high | Matte | Fine hair that goes flat; texture and lift | A pea; one guide says slightly damp hair spreads it more evenly |
| Paste | Medium to firm | Matte to semi-shine | Any hair type, the all-rounder | Warm it first; damp or dry |
| Wax | Strong | Low to medium | Fine to medium hair; very thick hair may need more control (one guide) | Soften first; dry or slightly damp; some waxes resist water, so wash well |
| Pomade | Strong, long-lasting | High, wet look | Thick, coarse hair; slick-backs, side parts | Start small; damp hair is more flexible, dry hair sharper |
| Cream | Light to medium | Natural, low | Frizz, curls, everyday | Towel-dried damp hair, a little |
| Gel | Strong | Medium to high | Any hair type | A pea; once dry it can’t be reshaped, water revives it |
| Spray | Light to firm | Mostly low | The last step | From about 30 cm |
| Texture powder, salt spray | Almost none | Matte | Mid-length to long hair that wants lift | Mid-lengths and ends; on the roots it weighs down (one guide) |
Three rules are enough:
- Fine, soft hair: clay, not heavy pomade. Two guides say pomade’s weight and shine press fine hair flat and make it look greasy.
- Thick, coarse hair is where pomade earns its place. It controls the hair, and the shine matches coarse hair’s own gloss.
- Water-based or oil-based? Read the label. Water-based rinses out in one wash; oil-based pomade survives several, and daily use builds up.
Dermatology points the other way from all of that: use fewer long-lasting-hold products, because combing after applying them can break hair, and a style that doesn’t need them is better. So pick the weakest hold that works, spread it with your fingers, and leave the comb out of it.
How much, and how to put it on: a pea, then add
- Start with a pea. One guide gives that amount for clay and another for gel. Too much clay turns white and stiff, like a crust.
- Add in half-pea steps. You can always put more on; you can only wash it off.
- Warm it between your palms first. Rub until it softens and turns slightly tacky. Cold product clumps, thick in places and bare in others.
- Dry or damp hair? The guides disagree. One barber guide says clay spreads best on slightly damp hair; another says gel goes on dry hair. Dry hair is easier, I think, for clay, paste and pomade: what you see is the final look, and you can add a little at a time. If it clumps or goes on unevenly, move to slightly damp.
- Roots depend on the product. Clay and paste lift hair by friction, so they can go to the roots; cream and oily products flatten roots, and one salon guide keeps them to mid-lengths and ends.
- Never on soaking hair. Water thins gel and it never sets.
Washing and product build-up
The AAD’s rule: wash by how often the hair gets dirty or oily. Straight hair with an oily scalp can be shampooed daily. Dry, textured, curly or thick hair, when needed, and at least once every 2 to 3 weeks.
Put the shampoo on the scalp, not along the whole length. That clears built-up product, dead skin and excess oil without drying the lengths. Follow with conditioner: on the ends for fine or straight hair, along the whole length for dry or curly hair.
So if your hair keeps going flat and the roots always feel greasy, check two things first: is product being left behind, and is the scalp getting washed? Water-based products rinse out in one wash; an oil-based pomade can stay until the next.
If you are shedding clearly more than usual, or see patches getting thinner, see a dermatologist. This article doesn’t cover that.
What goes wrong: flat, greasy, stiff, gone by lunch
- Flat by lunchtime. Usual causes: stopped before the roots were dry; no cool air; shaped on wet hair; cream or oil on the roots; damp weather. Fix: dry the roots, 5 to 10 seconds of cool air, keep product off the roots. One guide adds that a parting always in the same place trains the roots to lie flat; moving it about 1 cm gives a little lift.
- Greasy look. Too much, or a shiny product on fine hair. Fix: switch to matte clay and halve the amount.
- Stiff, white, crusty. Too much clay, gel or spray. Fix: use less and rub it out between your palms first.
- Won’t hold a shape. Applied to soaking hair and diluted. Fix: let the hair dry partway first.
Once it is done, go back to the step in section 2: take the photo and look at which level the volume landed on. Put in the right place, the same cut reads differently; which place that is depends on your face shape.
FAQ
Is it better to blow-dry or air-dry your hair?
Dermatologists say to air-dry when you can and to use low or medium heat when you do not. In one lab test on hair tresses, a dryer held 15 cm away and kept moving did less damage than air-drying for over two hours; a dryer held close and hot damaged the surface.
What is the difference between hair clay and pomade?
Clay dries matte, holds medium to medium-high and lifts strands apart, so it suits fine hair that goes flat. Pomade shines and holds strongly, which suits thick, coarse hair better; on fine hair it can look greasy.
How do I get volume on top of flat, fine hair?
Dry the roots on top first, lifting the hair with your fingers against the way it falls, then switch to cool air for 5 to 10 seconds. Keep oily or creamy products off the roots and start with a pea of matte clay.
Is washing your hair every day bad for it?
It depends on how oily your scalp is. The American Academy of Dermatology says straight hair with an oily scalp can be washed daily; dry, curly or thick hair, only when needed and at least every 2 to 3 weeks. Put shampoo on the scalp, not along the whole length.
Does hair gel or pomade damage your hair if you use it daily?
Dermatologists advise using fewer long-lasting-hold products, and combing after applying them can snap hair. Use the weakest hold that works and spread it with your fingers. Wash down to the scalp so build-up goes; water-based products rinse out in one wash, oil-based pomade can linger.
How long should styling my hair take?
The budget is 5 minutes for short to chin-length hair: about 1 minute to towel-dry, 2 to 3 for roots and cool air, about 1 for product and finish. It is a budget, not a measured average, and long hair takes longer, so time yourself once.