Contents
Jawline in photos: what decides it?A jaw in a photo is an outline plus a shadowChin forward, camera a little highLight and lens distanceOne change at a timeEveryday photos and measuring photos want opposite thingsFAQKey points
- A jawline in a photo is an outline plus a shadow, not bone.
- Chin forward and slightly down: clearest. Raised: the corner flattens. Tucked: a fold.
- Camera a little above the eyes, soft light from above and one side.
- An arm's-length front camera enlarges the nose and centre while the sides and jaw recede. Step back to 1.5–2 m.
- Measuring photos want the opposite: front-facing, level, even light.
Jawline in photos: what decides it?
Mostly not the jaw. Four things decide it: where the chin sits, how high the camera is, where the light comes from, and how far away the lens is.
A photo is flat. You see a jaw because of an edge between it and the neck: a turn in the outline plus a shadow under it. Each of the four sharpens, blurs or erases that edge.
This is photographers’ experience, not controlled studies. You can test it: same spot, same phone, one change at a time.
A jaw in a photo is an outline plus a shadow
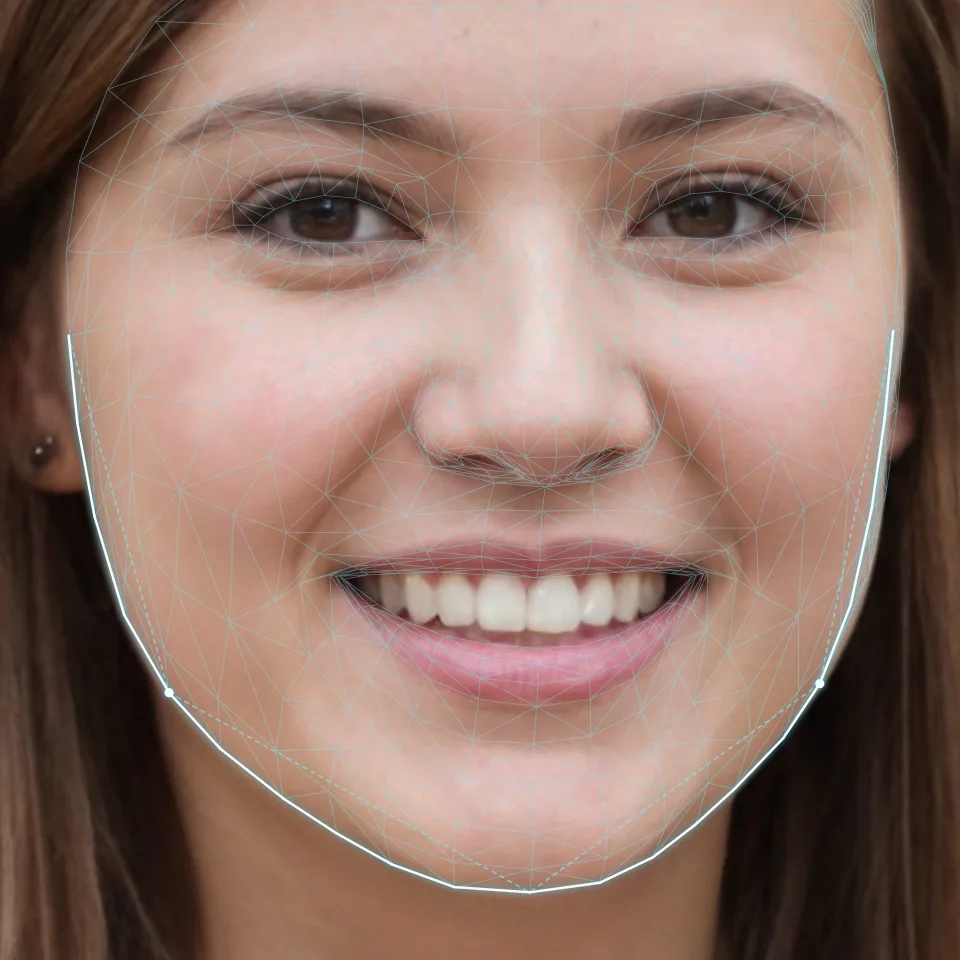
On the sample photo the photo-left corner is about 135° and the photo-right about 138–141°. Same face, same instant, 3 to 6 degrees apart, because the head is turned slightly and the far side gets squashed.
A photo measures the skin outline, not bone. One gonial angle guide notes that a reading near 180° almost always means hair over the corner, a turned head, a low camera, or soft tissue under the chin. A jawline can be photographed away, and back.
Chin forward, camera a little high
- Chin forward, then slightly down. Photographers’ favourite move: skin under the chin stretches and the face separates from the neck. Think “forehead toward the lens”, not “chin out”, and keep it small.
- Chin raised. The lens sees the jaw’s underside and a lot of neck; the corner flattens.
- Chin tucked back. A fold forms under the chin and the corner sinks in.
- Camera a little above eye level. About 10–15° down, by rule of thumb: the face reads narrower, the edge clearer. From below the chin, the underside is enlarged.
- Turn and tilt a little. Square to the lens, a face looks wider; a slight turn brings out the jaw.
Light and lens distance
Light decides whether the shadow exists. From above, the chin blocks it and the shadow lands on the neck, drawing the jaw.
- Soft light from above and one side is the standard: at a window, stand at about 45° to it, light above your eyes.
- Flat front light leaves almost no shadow, so the line under the jaw goes too.
- Midday sun and ceiling lights point straight down: hard shadows, dark eye sockets.
- Shadow too deep? White paper at chest height bounces light up; the shadow lightens but stays.
With lenses, distance matters. A front camera at arm’s length is a close wide angle: the nose and the centre of the face grow while the sides and the jaw recede, so the jaw corner reads differently (more in selfie distortion). Use a timer and step back to 1.5–2 m. Around 50–85 mm full-frame equivalent is closest to face-to-face.
One change at a time
| Change | What happens to the jaw line |
|---|---|
| Chin forward, slightly down | Face and neck separate |
| Chin raised | Corner flattens |
| Chin tucked back | A fold hides the corner |
| Camera just above the eyes | Edge clearer |
| Camera below the chin | Underside enlarged |
| Soft light, above and to one side | Soft shadow under the jaw |
| Flat front light | Jaw and neck merge |
| Front camera at arm’s length | Centre grows, sides and jaw recede |
| Step back, 50–85 mm | Face-to-face proportions |
Everyday photos and measuring photos want opposite things
All of the above is for everyday photos, and each move works by changing the outline the camera records.
So a photo for measuring proportions, such as jaw width against cheekbone width or the jaw angle, needs the reverse: face the lens, camera level with the eyes and 1.5–2 m away, even light, hair behind the ears. The setup is in the facial thirds guide. Keep spot, light and pose the same to compare over time. A face report built from a front-facing photo can read the jawline from that kind of shot.
The goals differ; one photo rarely serves both. For the kinds of jawline, see jawline types; for how light shapes the face, see lighting and facial depth.
FAQ
How do I show my jawline in a selfie?
Phone a little above eye level, face turned slightly toward a window, chin forward and a touch down. Better: a timer and a step back to 1.5–2 m.
Why do my two sides look different?
Faces are never fully even, and a slight turn squashes the far side. Shoot both sides; viewing the photo upside down makes the difference easier to see.
What if the only light is from the ceiling?
Switch it off and use a window. If there is none, put a lamp to one side at eye height to offset the hard shadows from above.