Contents
Highlight and contour basics: which way does each plane face?Which planes catch light, which turn awayContour is shadow, bronzer is sunFive jobs of highlight, and spots to skipGlow versus oily shineCream before powder, and the limits of the craftFAQKey points
- Highlight on planes facing forward or up; shadow on planes turning away, down or in.
- Contour is shadow: cool, matte, a shade or two deeper. Bronzer is sun: warm, on high points. Mixing them up is the usual mistake.
- Highlight makes a spot look higher, wider or fuller, so some spots are better skipped.
- Glow sits where you put it; oily shine sits where you did not. Cream before powder.
Highlight and contour basics: which way does each plane face?
A face is a set of planes. The bridge of the nose faces forward, its underside down, and under the cheekbones the surface often turns down and in.
The more squarely a surface faces the light, the brighter it is. A 2013 study starts there: the eye reads brightness as surface direction, and direction as depth.
Highlight and contour paint that pattern in: highlight on planes that would catch light, shadow on planes that would turn away. So there is no universal map. The same spot can face forward on one face and down on another. For where depth comes from, see facial depth.
Which planes catch light, which turn away
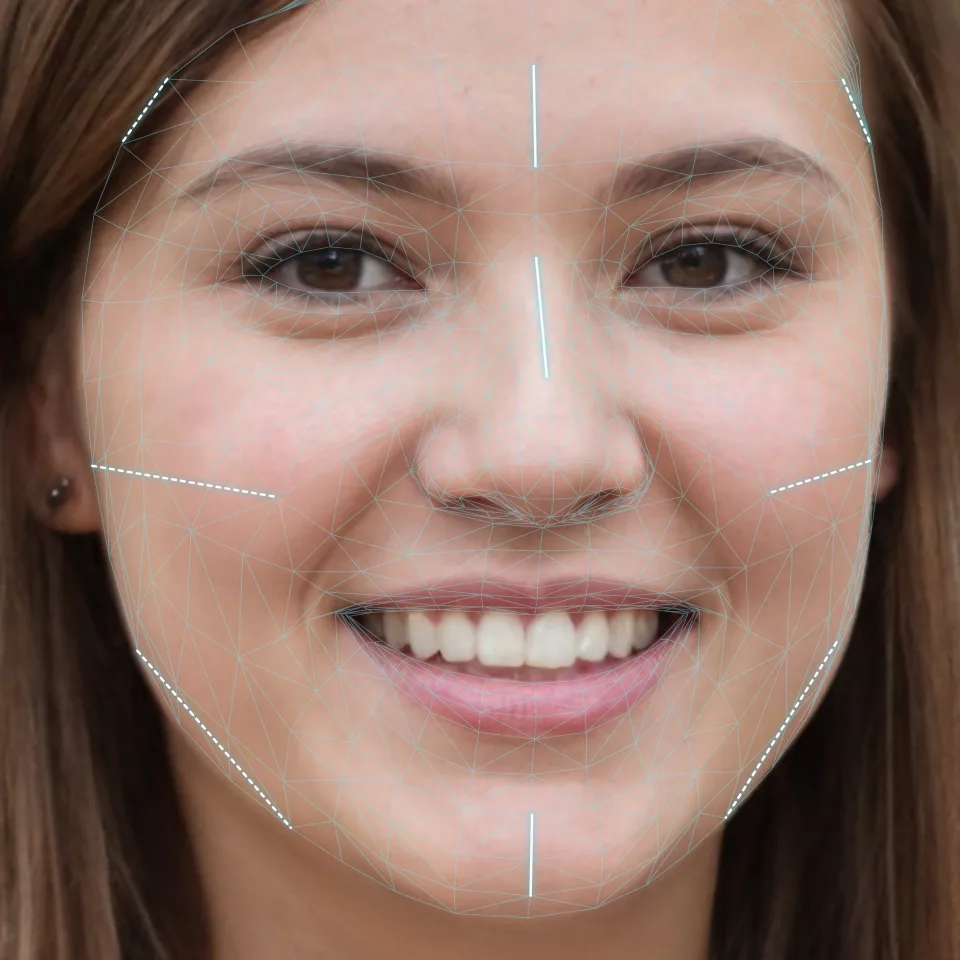
Light mostly comes from above and in front. Using the planes artists draw:
| Area | Highlight or shadow | Why |
|---|---|---|
| Centre of forehead | Highlight | Faces forward, slightly up |
| Bridge of nose | Highlight | Angles forward |
| Top of cheekbones, chin tip | Highlight | Forward-facing high points |
| Under the eyes, inner side | Highlight | Lower lid tilts down, so it runs dark |
| Under the cheekbones | Shadow | Cheek faces down when cheekbones outsize the jaw |
| Inner side of jawbone | Shadow | Faces away |
| Temples, sides of nose | Shadow | Front turns into side |
| Eye socket | Shadow | Under the brow bone faces down |
On the sample photo, jaw width ÷ cheekbone width is about 0.79, so the cheek faces down and a shadow is already there. When the widths are close, the cheek faces sideways and that shadow fades. For placement by face shape, see contour for your face shape. A face report from one front-facing photo is a quick way to see where your own face sits.
Contour is shadow, bronzer is sun
- Contour copies shadow. Real shadow is greyish, cool and dull, so use a cool or neutral taupe a shade or two deeper than your skin, with no shimmer. Shimmer reflects, and the shadow stops receding.
- Bronzer copies sun. Use a warm golden or reddish brown on the high points: forehead, cheekbones, chin, nose.
Mixing them up is the usual reason cheeks look muddy, orange or flat. Blend the edges: in that study, depth came from broad, gradual shading, not lines.
Five jobs of highlight, and spots to skip
Makeup teachers list five: shine, height, width, filling a hollow, and bouncing light into a shadow. Most change shape, so look first:
- Nose root: with close-set eyes, a raised root makes them read closer, so skip it. The sample photo’s gap is about 1.25 eye lengths; see eye spacing.
- Nose tip: dot it apart from the root. On a longer nose, one line reads longer.
- Chin tip: skip it if the chin is already long or the jawbone strong.
- Forehead: go light if it is already rounded or broad.
- Under the eyes: inside the bone. On the bone it looks puffy.
Glow versus oily shine
Glow comes from balanced skin or pearl you placed, on chosen high points. Oily shine comes from sebum, where you never meant to shine. Glow that turns oily within hours usually means oil in your base mixed with your own.
Build glow in two layers:
- Base: fine-pearl primer, thin and local, centred under the eyes. Cover the whole face and the contrast disappears.
- Shape: a pearlier highlighter, on raised planes only.
Sweep powder on thinly with a brush; a puff buries the glow.
Cream before powder, and the limits of the craft
Creams go on before setting powder, powders after, for highlight and contour alike; cream over powder goes patchy. One guide’s order: base, contour, bronzer, blush.
This is makeup-artist and drawing know-how. Real side light makes a face look deeper (lighting and facial depth), but whether painted shadow changes how others see a face has not been tested. It is a craft: try it, check it under another light, keep what works.
FAQ
Shimmer or matte highlighter?
Large pearl or glitter shows up in photos but can look unnatural up close. Fine pearl is softer; matte brightens without shine.
Why can't I get a glow when my skin is dry?
Dry skin rarely glows, so hydrate first. Shimmer also settles into fine lines and open pores over time.
What should I check before a photo?
Check in daylight by a window: are the edges blended, and is the shine only where you put it?